 ProblemPick
Canned Food Cluttering the Cabinet? Try These Organizers
Use a tiered shelf when rear labels disappear, a gravity dispenser for repeated compatible cans, a pull-out basket for a deep lower cabinet, a turntable for an awkward corner or a divided handled bin for mixed sizes. Measure the loaded setup—not just the empty organizer—before buying.
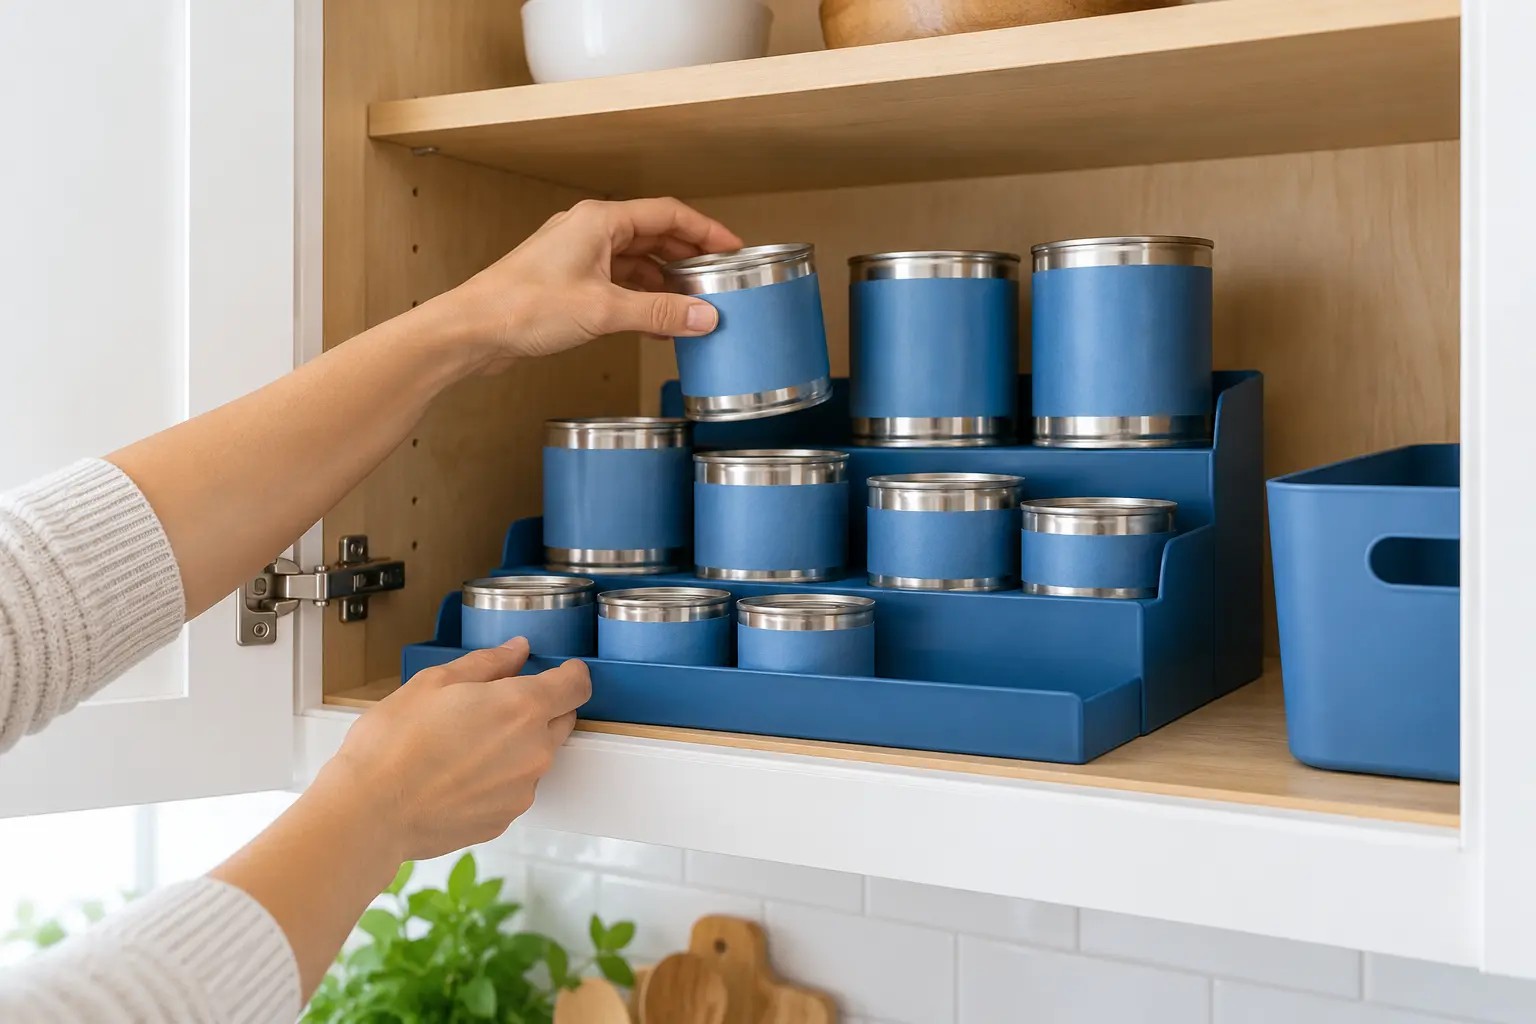
Keep the setup stable: Cans become heavy as a group. Follow the cabinet, shelf and organizer instructions, keep every can fully supported and avoid overloaded, unstable stacks. Follow the package's storage directions and keep damaged or questionable cans out of the organizer until handled according to the label or local food-safety guidance.
Why do cans become difficult to find?
Cans create a visibility problem before they create a capacity problem. The front row hides the back, short cans disappear behind tall ones and new purchases are often placed wherever a gap remains. A deep shelf then holds more food than you can scan without moving several items.
Empty one shelf and group cans by how they are used: everyday staples, meal-specific ingredients and occasional items. Within each group, arrange similar sizes together and move the earliest dates forward. This reveals whether the real problem is hidden labels, unreachable depth, an awkward corner or incompatible can sizes.
This guide covers sealed canned goods. Reusable food-storage containers and loose plastic lids need a different layout; see our container-and-lid organization guide. For the whole room, start with small-kitchen storage planning.
What should you measure before buying?
Use a cardboard footprint for the organizer. Place the largest cans on it, open the door fully and test whether adjacent shelves and drawers still work before ordering.
Which organizers work for canned goods?
Tiered shelf organizer
Best for a shallow cabinet where labels disappear behind the front rowStepped levels raise the second and third rows so more cans remain visible from the cabinet opening. It works especially well when most cans are similar in height and the shelf is not very deep.
- Benefits
- Makes rear rows easier to see
- Needs no permanent installation
- Keeps everyday cans within one shelf zone
- Check before buying
- Measure clear cabinet width, depth and height, including the tallest can on the highest step. Compare step depth with the largest can base and confirm the organizer has a stable, nonslip footprint.
- Possible drawback
- Steps use vertical space and reduce usable depth. Tall cans on the back level may hit the shelf above, while short cans can still hide behind larger ones.
Gravity-fed can dispenser
Best for repeated standard-size cans that should move forward as one is removedSloped lanes keep a limited group together and bring the next can toward the front. Separate lanes can distinguish frequently used categories without stacking cans loosely.
- Benefits
- Brings the next can forward
- Creates clear lanes for repeat items
- Reduces loose stacking
- Check before buying
- Measure the dispenser's full width, depth and loaded height. Check the supported can-diameter range, lane width, stated capacity and whether cans can be loaded and removed without hitting the shelf above.
- Possible drawback
- Fixed lanes may waste space with mixed can sizes, and the frame itself occupies cabinet volume. Loading older and newer purchases in the desired order requires a consistent routine.
Pull-out cabinet basket
Best for a deep lower cabinet where the back is hard to reachA sliding basket brings the full group to the cabinet opening. Cans can stay upright in one layer or in short, stable rows without reaching past front items.
- Benefits
- Improves access to deep storage
- Keeps the group inside one movable zone
- Makes a low cabinet easier to scan
- Check before buying
- Measure the narrowest clear opening after hinges and face frames, plus cabinet depth and installation space. Compare the loaded weight with the basket and slide ratings, and confirm adjacent doors can open.
- Possible drawback
- A pull-out costs more, needs compatible mounting and uses space for slides and frame. A deep basket can still become a mixed pile without dividers or clear categories.
Low-sided turntable
Best for an awkward corner or mixed can sizes that fit one rotating levelA turntable brings the back of a corner cabinet around to the front. A raised rim helps keep cans on the platform while the whole group remains reachable without lifting a tray.
- Benefits
- Uses an awkward corner
- Brings rear cans forward by rotation
- Works with several can diameters
- Check before buying
- Measure the complete turning diameter, shelf depth and clearance around hinges and cabinet walls. Place the largest cans around the edge on a cardboard circle and test rotation before ordering.
- Possible drawback
- The round footprint leaves unused corners on a rectangular shelf, and too many heavy or tall cans can make the platform crowded or difficult to turn.
Handled bin with dividers
Best for grouping mixed cans by meal, ingredient or use frequencyA removable bin creates one defined category and can be pulled forward for a complete view. Adjustable or removable dividers stop small cans from disappearing between larger ones.
- Benefits
- Groups mixed sizes deliberately
- Easy to relabel or reorganize
- Can move between shelves
- Check before buying
- Measure the cabinet opening and usable shelf depth, then compare the bin's internal base dimensions, handle clearance and stated load. Make sure the loaded bin remains comfortable to slide rather than lift.
- Possible drawback
- Bin walls consume space, opaque sides may hide short cans and a heavily loaded bin can be awkward. It works best with a limited category, not the entire cupboard.
ProblemPick compares product types, not current offers. Amazon shows products, prices, ratings, availability and seller terms only after you choose to open a link.
Quick comparison: which canned-food organizer fits?
| Organizer type | Best use | Main limitation |
|---|---|---|
| Tiered shelf organizer | Best for a shallow cabinet where labels disappear behind the front row | Steps use vertical space and reduce usable depth. Tall cans on the back level may hit the shelf above, while short cans can still hide behind larger ones. |
| Gravity-fed can dispenser | Best for repeated standard-size cans that should move forward as one is removed | Fixed lanes may waste space with mixed can sizes, and the frame itself occupies cabinet volume. Loading older and newer purchases in the desired order requires a consistent routine. |
| Pull-out cabinet basket | Best for a deep lower cabinet where the back is hard to reach | A pull-out costs more, needs compatible mounting and uses space for slides and frame. A deep basket can still become a mixed pile without dividers or clear categories. |
| Low-sided turntable | Best for an awkward corner or mixed can sizes that fit one rotating level | The round footprint leaves unused corners on a rectangular shelf, and too many heavy or tall cans can make the platform crowded or difficult to turn. |
| Handled bin with dividers | Best for grouping mixed cans by meal, ingredient or use frequency | Bin walls consume space, opaque sides may hide short cans and a heavily loaded bin can be awkward. It works best with a limited category, not the entire cupboard. |
Which option suits your cabinet?
Can you reach the shelf but not see the rear labels?
Start with a tiered organizer. Keep tall cans on the back step and shorter cans toward the front only when every base is fully supported.
Do you repeatedly buy the same standard cans?
A gravity-fed dispenser can create a simple forward-moving lane. Check every can diameter and load the group consistently rather than mixing sizes inside one track.
Is the cabinet deep and low?
Use a pull-out basket if the clear opening and mounting surface suit it. A handled bin is the simpler removable alternative when permanent installation is not appropriate.
Is the available shelf an awkward corner?
A low-sided turntable can bring the back around to the front. Choose a diameter that rotates without touching the door, wall or neighboring items.
Are sizes and categories mixed?
Use a handled bin with dividers. Give each section a limited role and avoid hiding small cans underneath larger ones.
How do you set up an easy canned-food rotation?
Browse more focused solutions in the Kitchen and Organization guide collections.
Canned-food organizer buying checklist
Canned-food cabinet FAQs
What is the best way to organize canned goods in a cabinet?
Start by grouping cans by use and placing the earliest dates toward the front. For a shallow cabinet, a stable tiered shelf is the simplest visibility fix. Use a pull-out for a deep lower cabinet, a turntable for an awkward corner or a dispenser only when many cans share compatible dimensions.
Should canned goods be stacked?
A short, stable stack may fit some shelves, but individual cans become harder to see and remove. Follow the can and organizer instructions, avoid unstable towers, and make sure the shelf and organizer are suitable for the total loaded weight.
How do I measure for a canned-food organizer?
Measure clear width, depth and height at the cabinet opening, not only inside the shelf. Include hinges, face frames, shelf lips and the tallest can in its final position. For a turntable, test the full rotating diameter.
Is a tiered shelf better than a can dispenser?
A tiered shelf suits mixed categories when seeing labels is the main problem. A dispenser suits repeated, compatible can sizes and a first-forward routine. The dispenser is less flexible when diameters, heights or quantities change.
How should I organize cans with different sizes?
Separate very small, standard and tall cans before choosing a product. Use divided bins or a turntable for mixed diameters, or assign different tier levels by height. Do not assume one dispenser lane will fit every can.
How often should I reset the canned-food cabinet?
Review it when groceries are put away. Move older stock forward, place new purchases behind the matching group, remove empty dividers and stop adding cans when the organizer no longer allows one-step access.